· 4 min read
HOW TO INSTALL OPENVPN ON UHOST FOR SECURE ACCESS ANYWHERE
Unlock secure and remote access to your cloud infrastructure with OpenVPN. By installing OpenVPN on your Virtual Private Cloud (VPC) and cloud compute instances, you empower your organization with a robust and encrypted virtual private network (VPN) solution that keeps your data and communication safe from prying eyes, while ensuring accessibility from anywhere on the globe.
Here’s how to use SCloud Console to install your OpenVPN:
- 1. Virtual Private Cloud (VPC):
Establish a Virtual Private Cloud (VPC) within your cloud platform to create an isolated, secure network environment for your OpenVPN deployment. This safeguards your cloud resources and data from external threats.
- 1.1. Sign in into SCloud Console
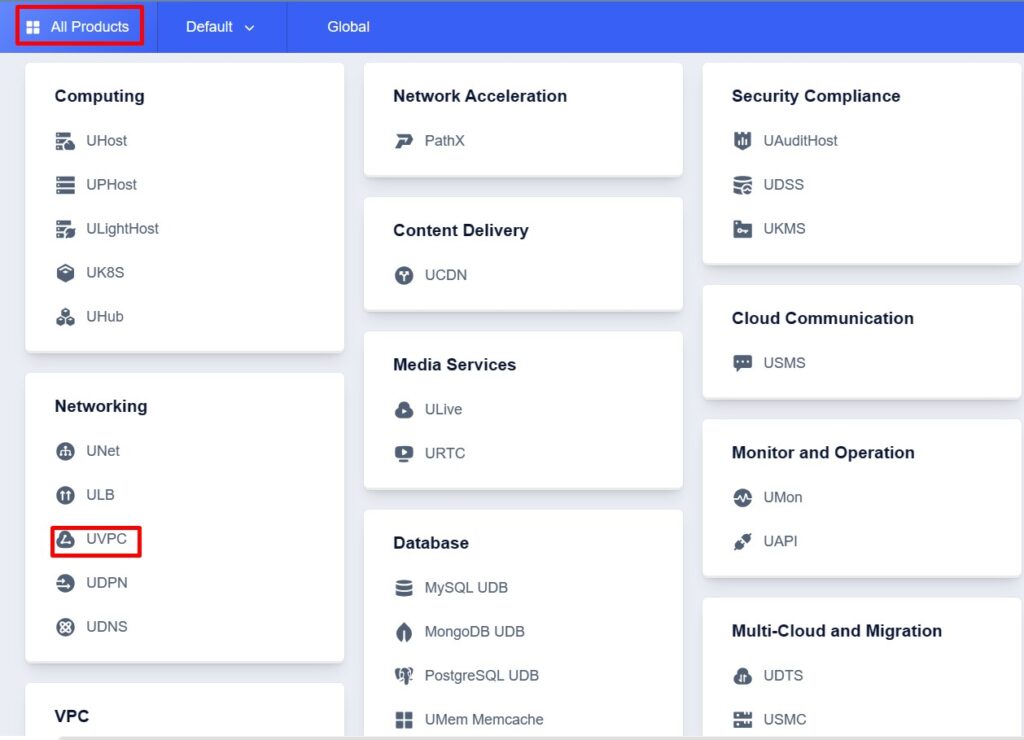
- 1.2. Hover over ‘All Products’ on the top left & click on ‘UVPC’
- 1.3. Choose the region you wish to create your instances in. Take note that both UVPC and the UHost region should be the same to prevent issues. Then, click ‘Create UVPC’

- 1.4. Fill the below information
- a. VPC Name: Enter the VPC name
- b. Keep the Network Segment for the VPC & select /20 for the subnet segment
- c. Subnet Name: Enter the subnet name then press ok

- 1.5. A pop up will appear as shown below. Click on to ‘Create UHost’

- 2. Cloud Compute Resources:
Choose the cloud compute instances that best suit your OpenVPN needs. Whether it’s virtual machines or serverless functions, your cloud compute resources provide the necessary computing power for secure access.
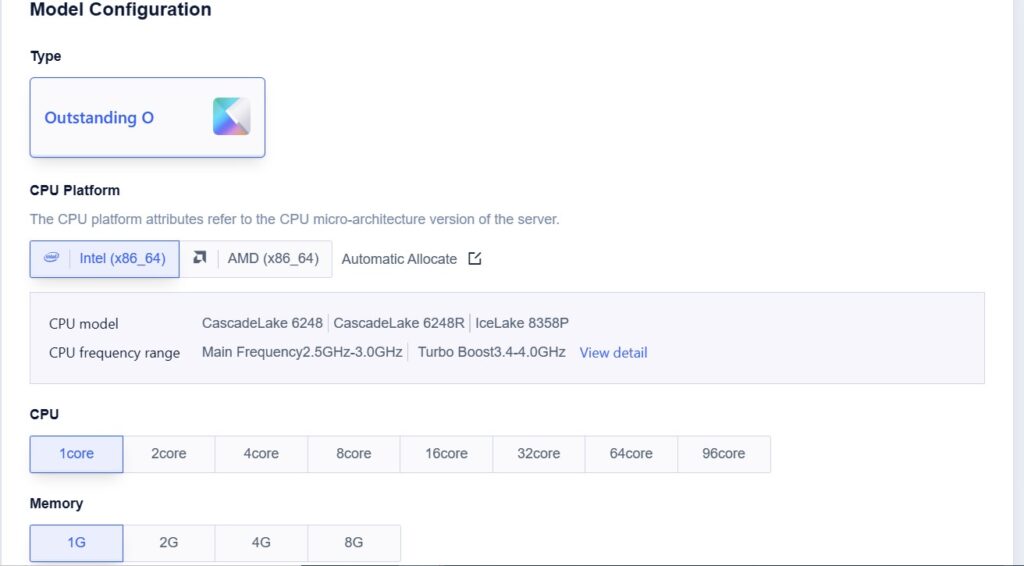
2.1. Select the UHost Configuration
- a. Region & Availability Zones

- b. Configure & select model configuration (UHost Type, CPU Platform, CPU Number of Cores, Memory)
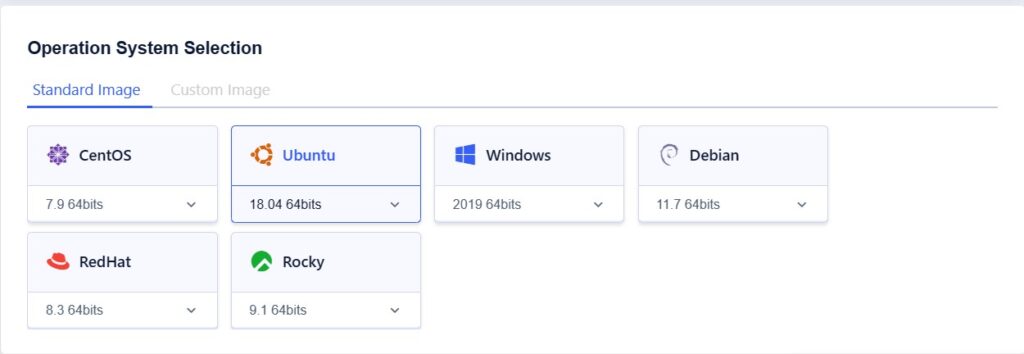
- c. Configure & select your OS
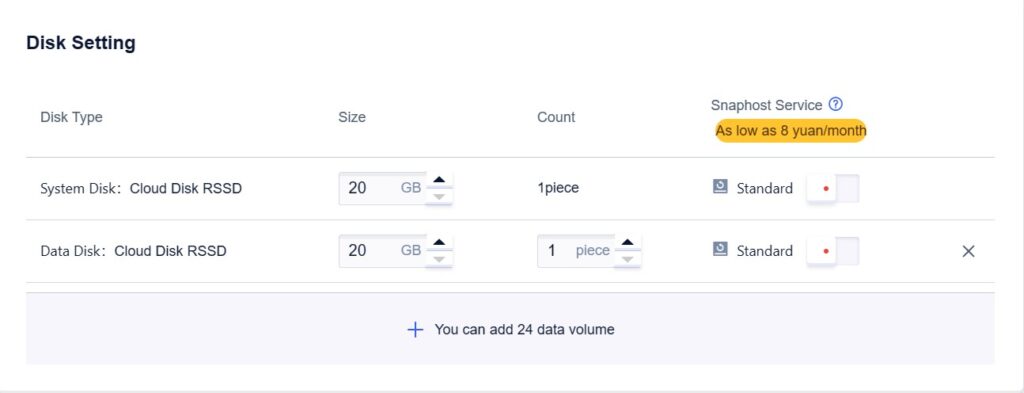
- d. Configure your disk settings (Disk Type, Size)
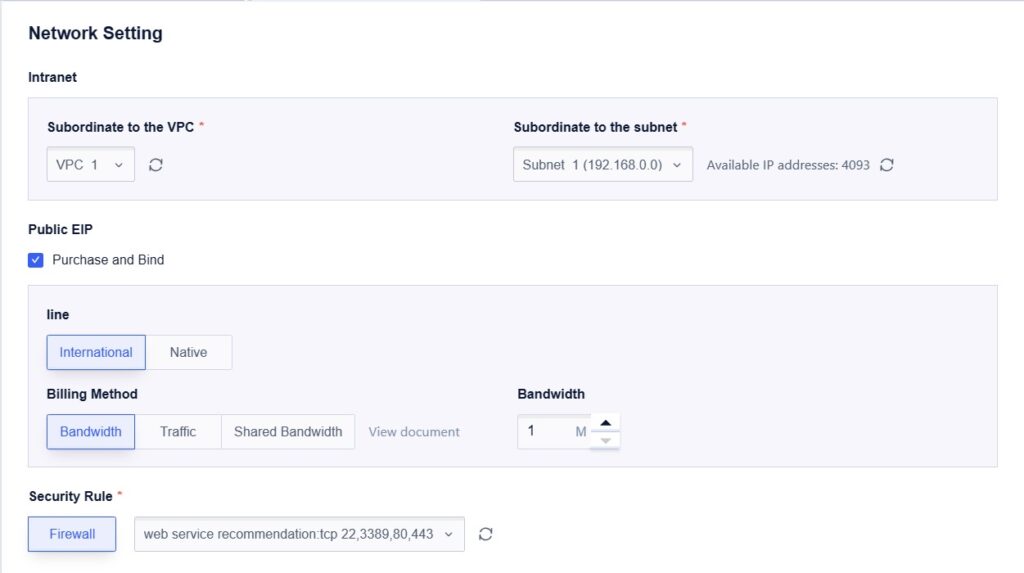
- e. Select the VPC which we have just created as below
- f. Configure your login settings for the UHost (password for root, login through Key Pair)

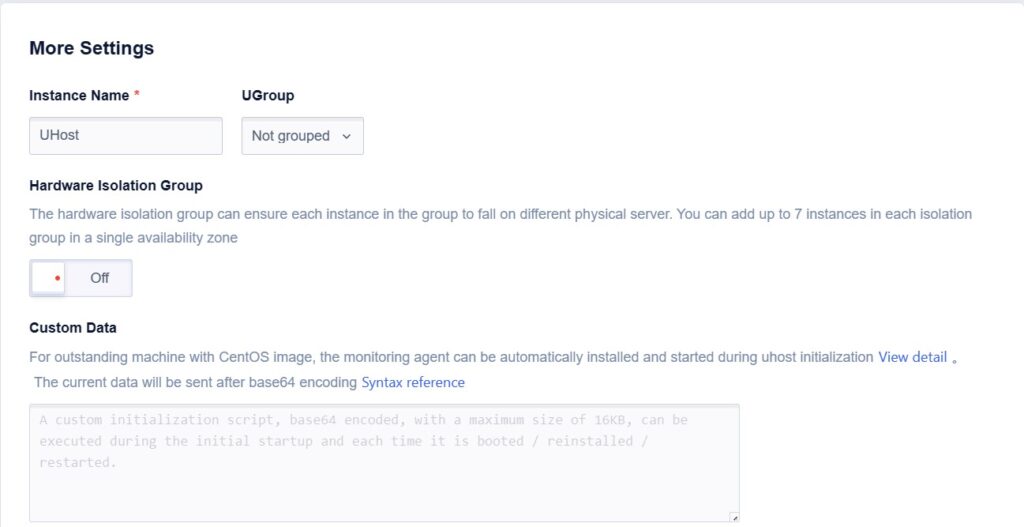
- g. Optional: You can configure more settings (UHost Name, bootstrap script etc. when the UHost initialized)


- 2.3. Login to your UHost: e.g. ssh ubuntu@165.154.242.225

- 3. OpenVPN Installation:
Install and configure OpenVPN on your chosen cloud compute instances. OpenVPN offers robust encryption, ensuring that data transmission remains confidential and secure.
3.1. Install OpenVPN using the below script
a. wget https://git.io/vpn -O openvpn-install.sh b. Change permission to be executable sudo chmod +x openvpn-install.sh c. Run the script sudo chmod +x openvpn-install.sh d. You will get the below setup steps, answer the questions as below
Welcome to this OpenVPN road warrior installer! Which protocol should OpenVPN use? 1) UDP (recommended) 2) TCP Protocol [1]: 1What port should OpenVPN listen to? Port [1194]:Select a DNS server for the clients: 1) Current system resolvers 2) Google 3) 1.1.1.1 4) OpenDNS 5) Quad9 6) AdGuard DNS server [1]: 2Enter a name for the first client: Name [client]: SCloud -openvpnOpenVPN installation is ready to begin. Press any key to continue…
e. Restart the OpenVPN service
sudo systemctl restart openvpn-server@server.service
f. Get the status you will find it running as below
sudo systemctl status openvpn-server@server.service

- g. Test your connectivity through by installing client on your Linux system:
- sudo apt install openvpn
- h. Copy the OpenVPN created to the path as below:
- sudo cp scloud-openvpn.ovpn /etc/openvpn/client.conf
- i. Test the connectivity with below command and it should work as shown:
- sudo openvpn —client —config /etc/openvpn/client.conf
Don’t forget to improve on your own with these considerations:
- 4. Certificate Management
Manage security certificates to authenticate users and devices, enhancing your OpenVPN’s access control and security.
- 5. Multi-Platform Compatibility
Ensure compatibility across multiple platforms and devices, so that users can access your VPC securely from any location.
- 6. Network Monitoring and Security Updates
Implement network monitoring and regularly update OpenVPN to stay ahead of security threats and vulnerabilities.
- 7. Seamless User Experience
Prioritize user experience by creating easy-to-follow guidelines for user setup and a reliable support system for any queries.
By combining the power of OpenVPN with the scalability and flexibility of VPC and cloud compute, you create a secure and accessible network that’s tailor-made for today’s dynamic work environments. Allow your team to access your cloud infrastructure securely, whether they’re in the office, at home, or on the go. Install OpenVPN on your VPC and cloud compute, and redefine your organization’s security and accessibility standards. For any enquiries, please email enquiry@scloud.sg.