· 6 min read
HOW TO RUN DRUPAL ON UHOST IN VPC ENVIRONMENT
Installing Drupal in the cloud offers numerous advantages, including scalability, high availability, and ease of management. SCloud provides a flexible infrastructure that can grow with your website’s needs, ensuring optimal performance during traffic spikes and minimizing downtime. Additionally, cloud environments offer built-in security features, automated backups, and simplified resource management. This not only streamlines the installation process but also reduces the burden of hardware maintenance, making it a practical choice for web developers and businesses looking for a reliable and cost-effective hosting solution for their Drupal websites. Installing Drupal on a Virtual Private Cloud (VPC) and a cloud compute instance involves setting up a secure and scalable environment for hosting your Drupal website.
Here’s how to use SCloud Console to run your Drupal:
- 1. Set Up a Virtual Private Cloud (VPC):
Create a VPC to isolate your resources. In the VPC, you can define your network topology, subnets, and security groups to control inbound and outbound traffic.
- 1.1. Sign in into SCloud Console
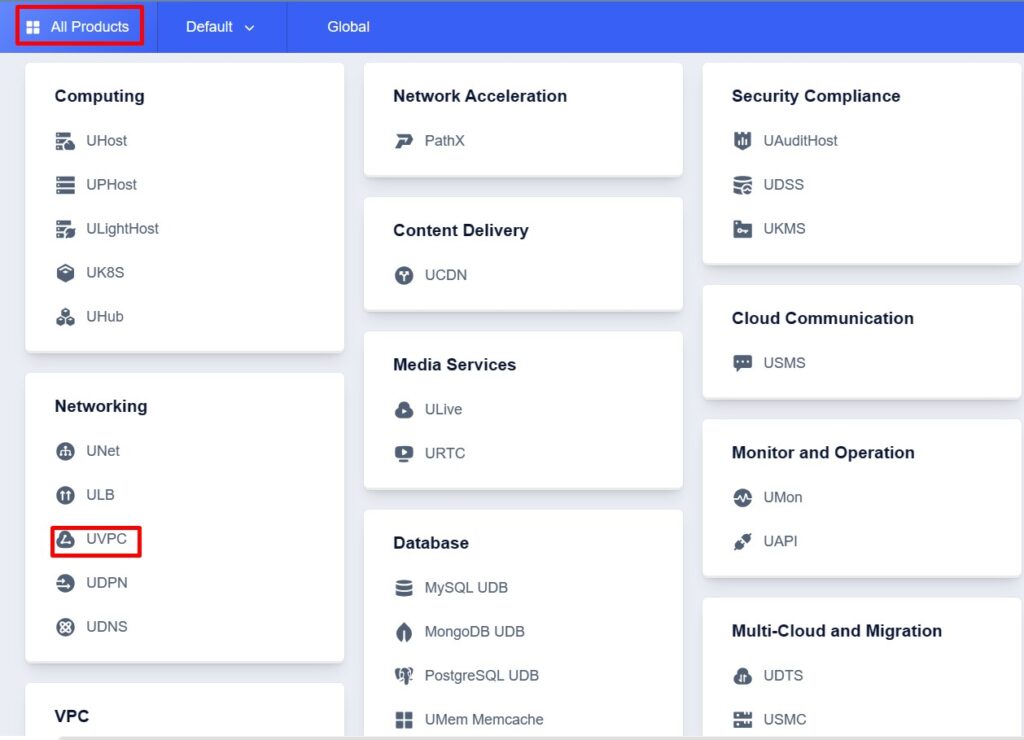
- 1.2. Hover over ‘All Products’ on the top left & click on ‘UVPC’
- 1.3. Choose the region you wish to create your instances in. Take note that both UVPC and the UHost region should be the same to prevent issues. Then, click ‘Create UVPC’

- 1.4. Fill the below information
- a. VPC Name: Enter the VPC name
- b. Keep the Network Segment for the VPC & select /20 for the subnet segment
- c. Subnet Name: Enter the subnet name then press ok

- 1.5. A pop up will appear as shown below. Click on to ‘Create UHost’

- 2. Launch a Cloud Compute Instance
Choose the cloud compute instances that best suit your Drupal and website needs. Whether it’s virtual machines or serverless functions, your cloud compute resources provide the necessary computing power for high availability and scalability.
2.1. Select the UHost Configuration
- a. Region & Availability Zones

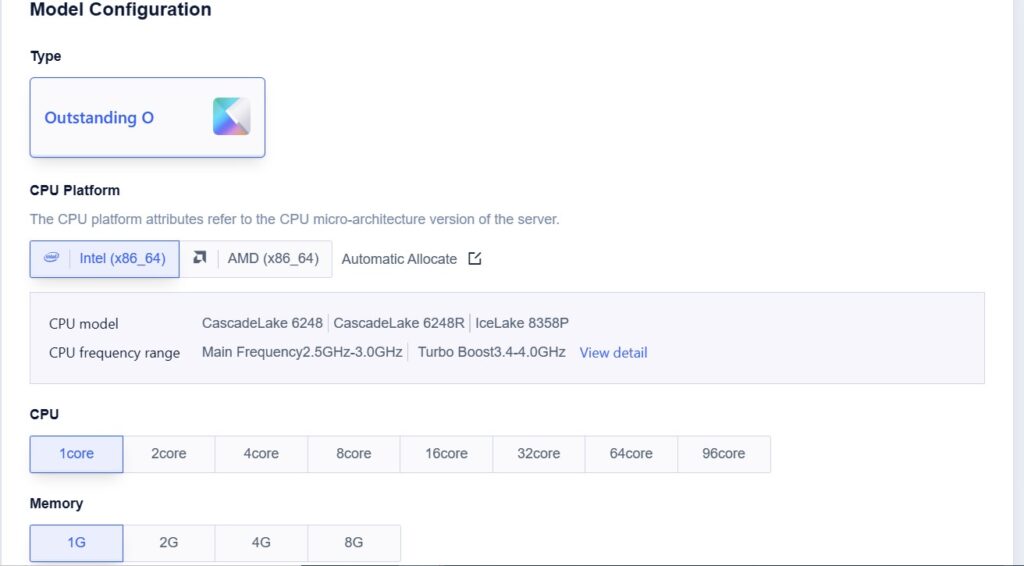
- b. Configure & select model configuration (UHost Type, CPU Platform, CPU Number of Cores, Memory)
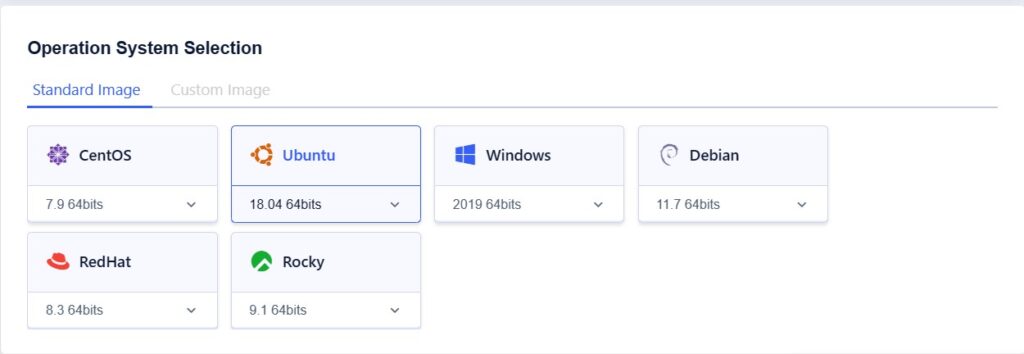
- c. Configure & select your OS
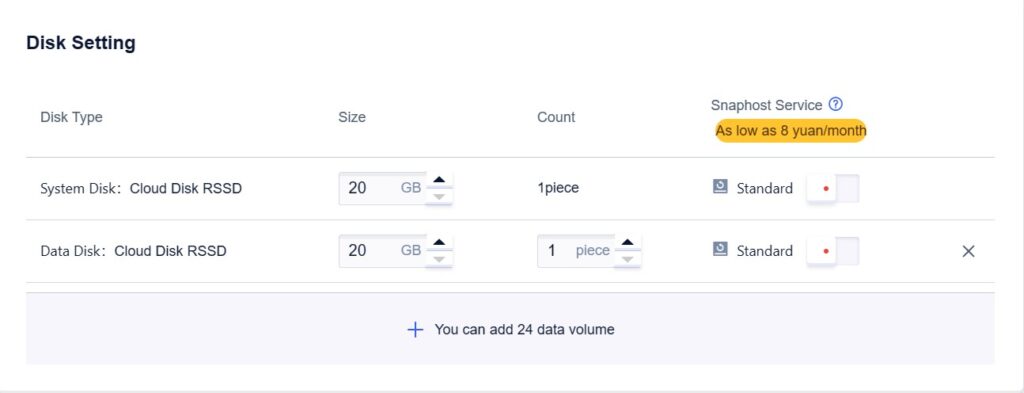
- d. Configure your disk settings (Disk Type, Size)
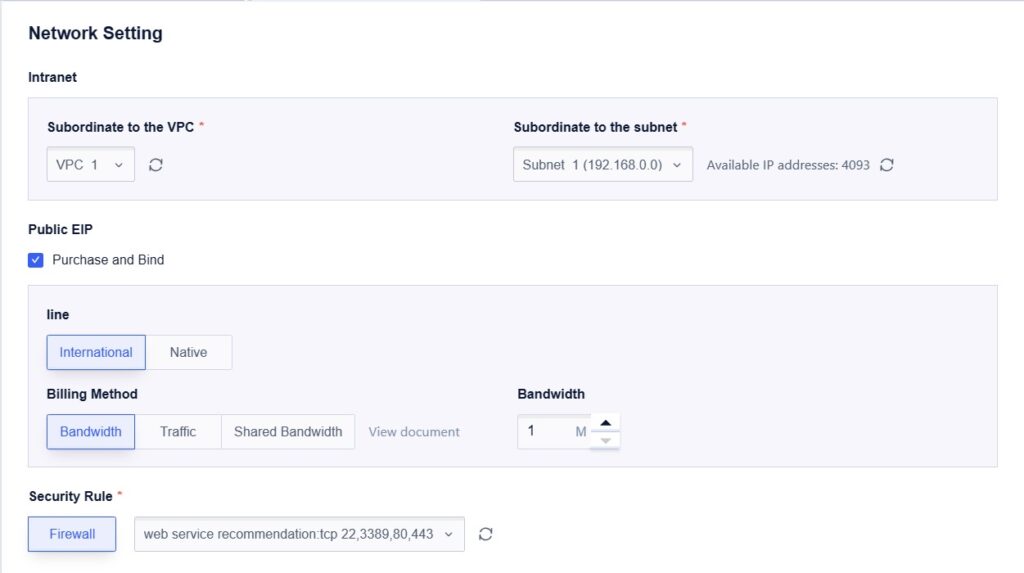
- e. Select the VPC which we have just created as below
- f. Configure your login settings for the UHost (password for root, login through Key Pair)

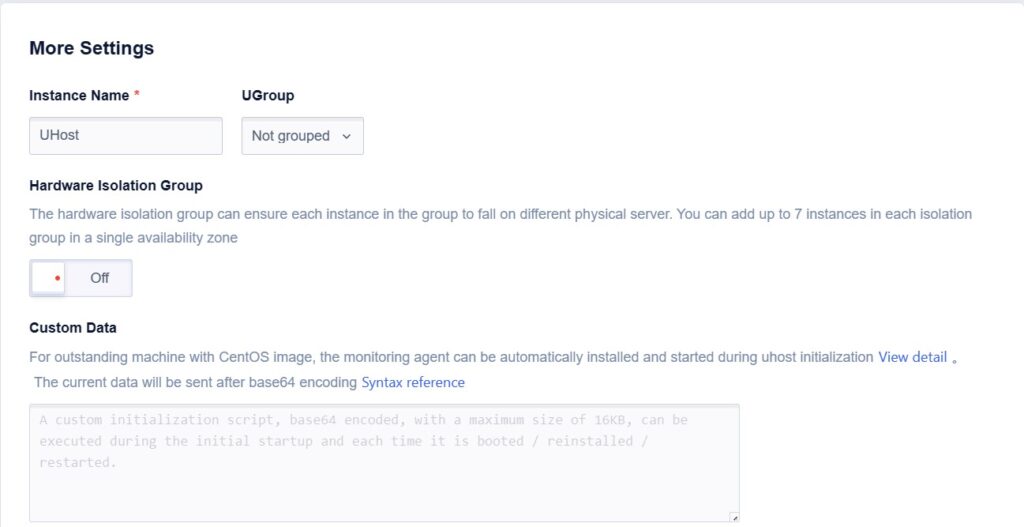
- g. Optional: You can configure more settings (UHost Name, bootstrap script etc. when the UHost initialized)


- 2.3. Login to your UHost: e.g. ssh ubuntu@165.154.217.49

- 3. Install and Configure Drupal:
Download the latest version of Drupal from the official website or use version control systems like Git to fetch the code. Then, set up a database, configure the web server, and run the installation wizard.
3.1. Update the System in order to install Drupal
sudo apt update && sudo apt upgrade -y
3.2. Install MariaDB Server
sudo apt install -y mariadb-server mariadb-client
3.3. Set the root password and mysql configuration
sudo mysql_secure_installation
3.4. Output will be as follows. Key in accordingly:
Enter current password for root (enter for none):OK, successfully used password, moving on…Change the root password? [Y/n] y New password: Re-enter new password: Password updated successfully! Reloading privilege tables.. … Success! Remove anonymous users? [Y/n] Y Disallow root login remotely? [Y/n] Y Remove test database and access to it? [Y/n] y Reload privilege tables now? [Y/n] y
3.5. Verify by login into the DB
mysql -u root -p

- 3.6. Create Database for Drupal
- mysql -u root -p CREATE DATABASE drupal; CREATE USER ‘drupal_user’@‘localhost’ IDENTIFIED BY ‘password’; GRANT ALL PRIVILEGES ON drupal.* to drupal_user@‘localhost’; FLUSH PRIVILEGES; \q

- 3.7. Install PHP
- sudo apt install php php-{cli,fpm,json,common,mysql,zip,gd,intl,mbstring,curl,xml,pear,tidy,soap,bcmath,xmlrpc}
- 3.8. Install Apache web server (for the purpose of this tutorial. You can decide your own)
- sudo apt install apache2 libapache2-mod-php
- 3.9. Update PHP’s memory limit and timezone
- sudo nano /etc/php/*/apache2/php.ini memory_limit = 256 date.timezone = UTC
- 3.10. Download the latest version from Drupal and install it
- wget https://www.drupal.org/download-latest/tar.gz -O drupal.tar.gz tar xvf drupal.tar.gz mv drupal-*/ /var/www/html/drupal
- 3.11. Change the Apache and group’s ownership of the directory of Drupal
- sudo chown -R www-data:www-data /var/www/html/ sudo chmod -R 755 /var/www/html/
- 3.12. Set up Apache Web Server for Drupal
- sudo a2dissite 000-default.conf sudo systemctl restart apache2
- 3.13. Now we are going to create Drupal Configuration file & copy the below script into this file:
- sudo vi /etc/apache2/sites-available/drupal.conf
<VirtualHost *:80> ServerName mysite.com ServerAdmin admin@example.com DocumentRoot /var/www/html/drupal/
CustomLog ${APACHE_LOG_DIR}/access.log combined ErrorLog ${APACHE_LOG_DIR}/error.log
<Directory /var/www/html/drupal> Options Indexes FollowSymLinks AllowOverride All Require all granted RewriteEngine on RewriteBase / RewriteCond %{REQUEST_FILENAME} !-f RewriteCond %{REQUEST_FILENAME} !-d RewriteRule ^(.*)$ index.php?q=$1 [L,QSA]
3.14. Use the below commands to enable the website:
- sudo apachectl -t
- sudo a2dismod mpm_event sudo a2enmod mpm_prefork sudo a2enmod php8.1 sudo a2enmod rewrite sudo a2ensite drupal.conf sudo systemctl restart apache2
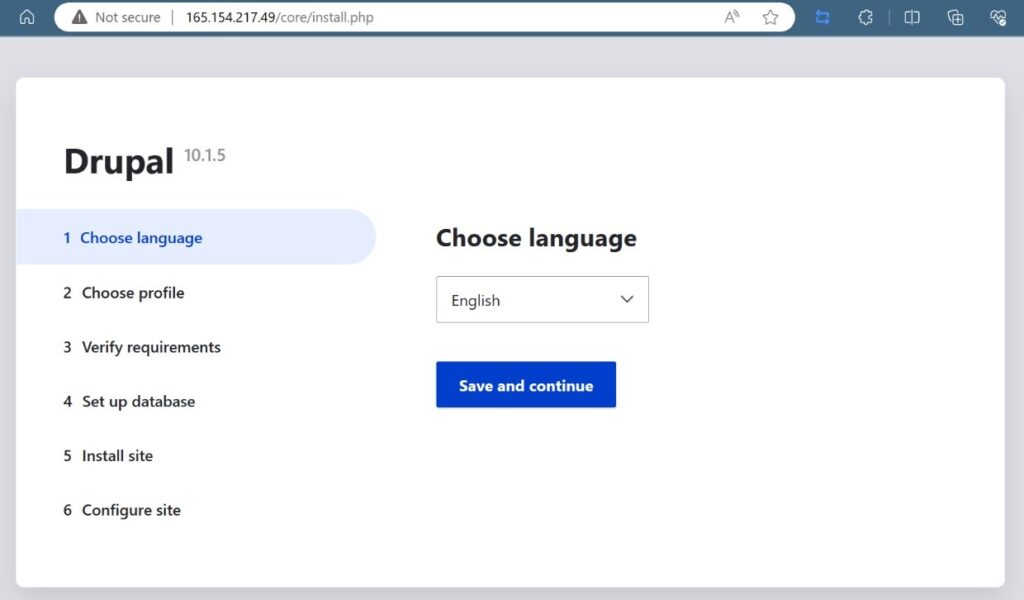
3.15. Now open your browser with the public IP of the instance to install Drupal.
- a. Choose your language
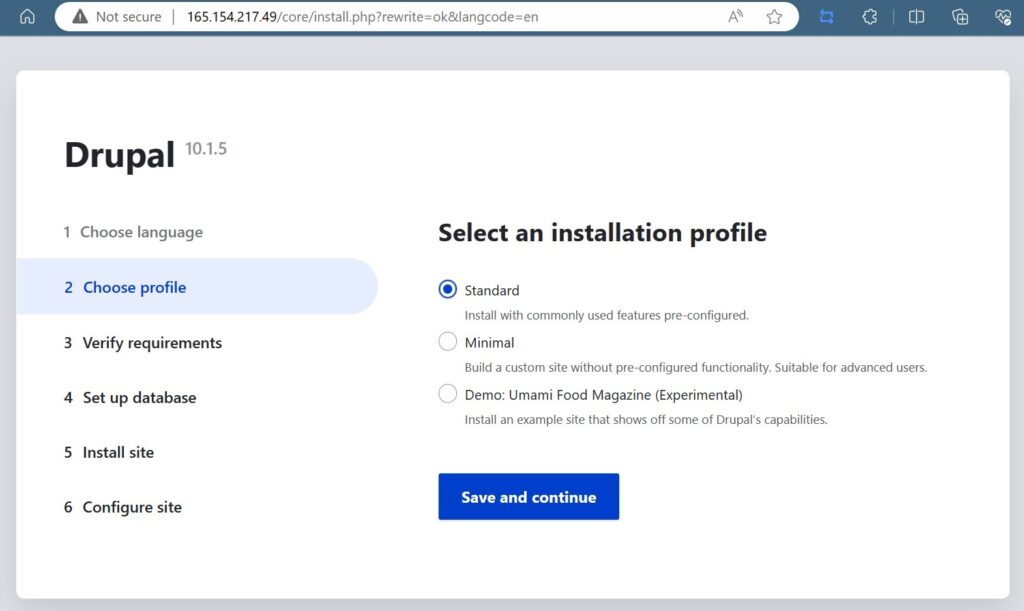
- b. Select your profile
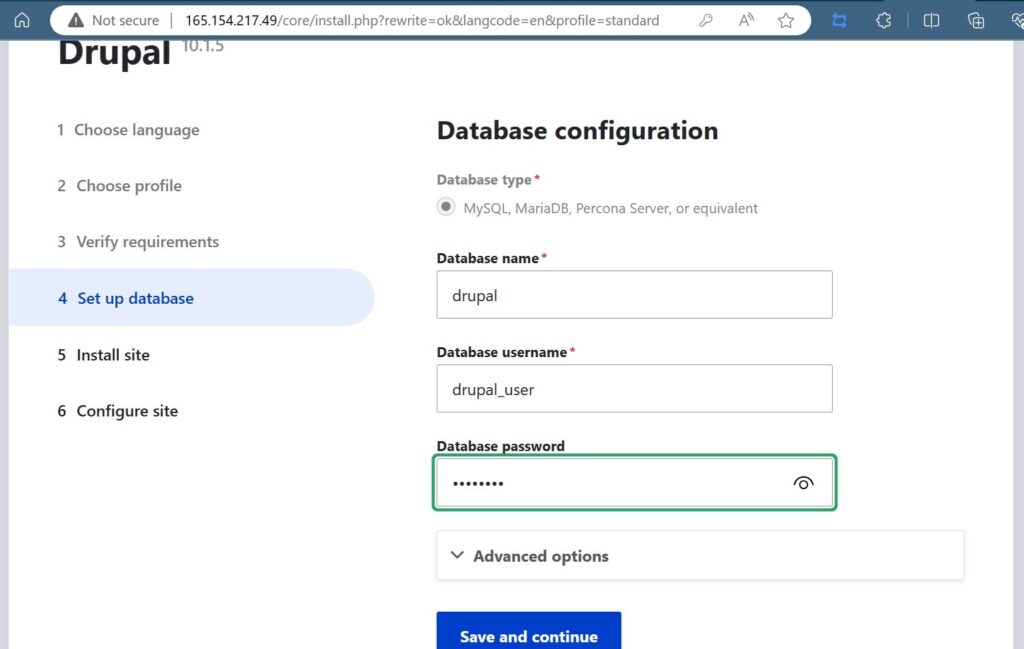
- c. Enter the username & password for the database which created earlier
- d. Enter your site information. After which, we are all set up!


Don’t forget to improve on your own with these considerations:
- 4. Security Hardening
Implement best practices for securing your Drupal installation, such as keeping software up to date, configuring strong passwords, and using security modules.
- 5. Site Optimisation
Optimize your Drupal site for performance by using caching, Content Delivery Networks (CDNs), and database tuning. Plan for scalability by adding load balancers, auto-scaling, and monitoring to handle increased traffic.
- 6. Monitoring and Maintenance
Implement monitoring and alerting tools to keep an eye on your server’s performance, security, and availability. Perform routine updates, patches, and security audits to keep your Drupal site running smoothly and securely.
- 7. Backup and Disaster Recovery
Set up regular backups of your Drupal site and database to ensure data recovery in case of issues. Test your backup and disaster recovery procedures to ensure you can recover from unexpected issues.
By following these steps, you can successfully install and run Drupal on a Virtual Private Cloud (VPC) and a cloud compute instance, creating a robust and scalable web hosting environment. Remember to follow best practices for security, performance, and maintenance to keep your Drupal website in top shape! For any enquiries, please email [enquiry@scloud.sg](mailto:enquiry@scloud.sg?subject=RE:HOW%20TO%20RUN%20DRUPAL %20ON %20UHOST %20IN %20VPC %20ENVIRONMENT).